Exploring UI/UX with Figma

For the last month, I have been using Figma for my UI/UX design process, in conjunction with my internship with SRIYOG Consulting. Figma enables seamless integration of UI and UX processes, it enables me to work on the full design process: Wireframing, Design, Design Systems, Prototyping and Collaborating.
Rather than going comprehensively into endless figma features, I would like to share my experience with how I navigated Figma for UI/UX design as part of my internship learning opportunity and try to save you hours browsing the internet trying to figure out how to begin with Figma and master the basics.
How does it work?
Here are the exact steps to follow.
Step 1: Make an account
As stupid and basic as it sounds, making a figma account is the first step you take. I, personally, had an intuition and a strong desire to learn designing with no prior experience or knowledge. And this is the first step I took.
You can visit Figma.com/signup to create an account. You can sign up using your email address, or with a Google account. You can learn more about figma pricing here: https://www.figma.com/pricing/ . But if you are just starting out, Free plan works great.
If you're a student or educator, you may qualify for a free version of Figma's Professional plan. Learn how to verify your education status.
Tip: Use your school provided email address to sign up on figma for instant verification and gain access to its professional plan for free.
Step 2: Understand the foundation
Learning UX or UI principles will not come automatically with learning Figma - Figma's just a tool. While Figma excels at enabling collaboration, prototyping, and component management, mastering UI/UX means mastering the process, not just the tool. Here are some articles regarding laws and color theory that designers can and should consider when building a user interface.
Basics and laws stay consistent since the collective goal of every designer is to ease user experience regardless of any tool you choose to implement that through.
- https://lawsofux.com/
- https://www.figma.com/resource-library/ui-design-principles/
- https://reloadux.com/blog/the-psychology-of-color-in-ui-design/
Step 3: Observe, Copy and Learn
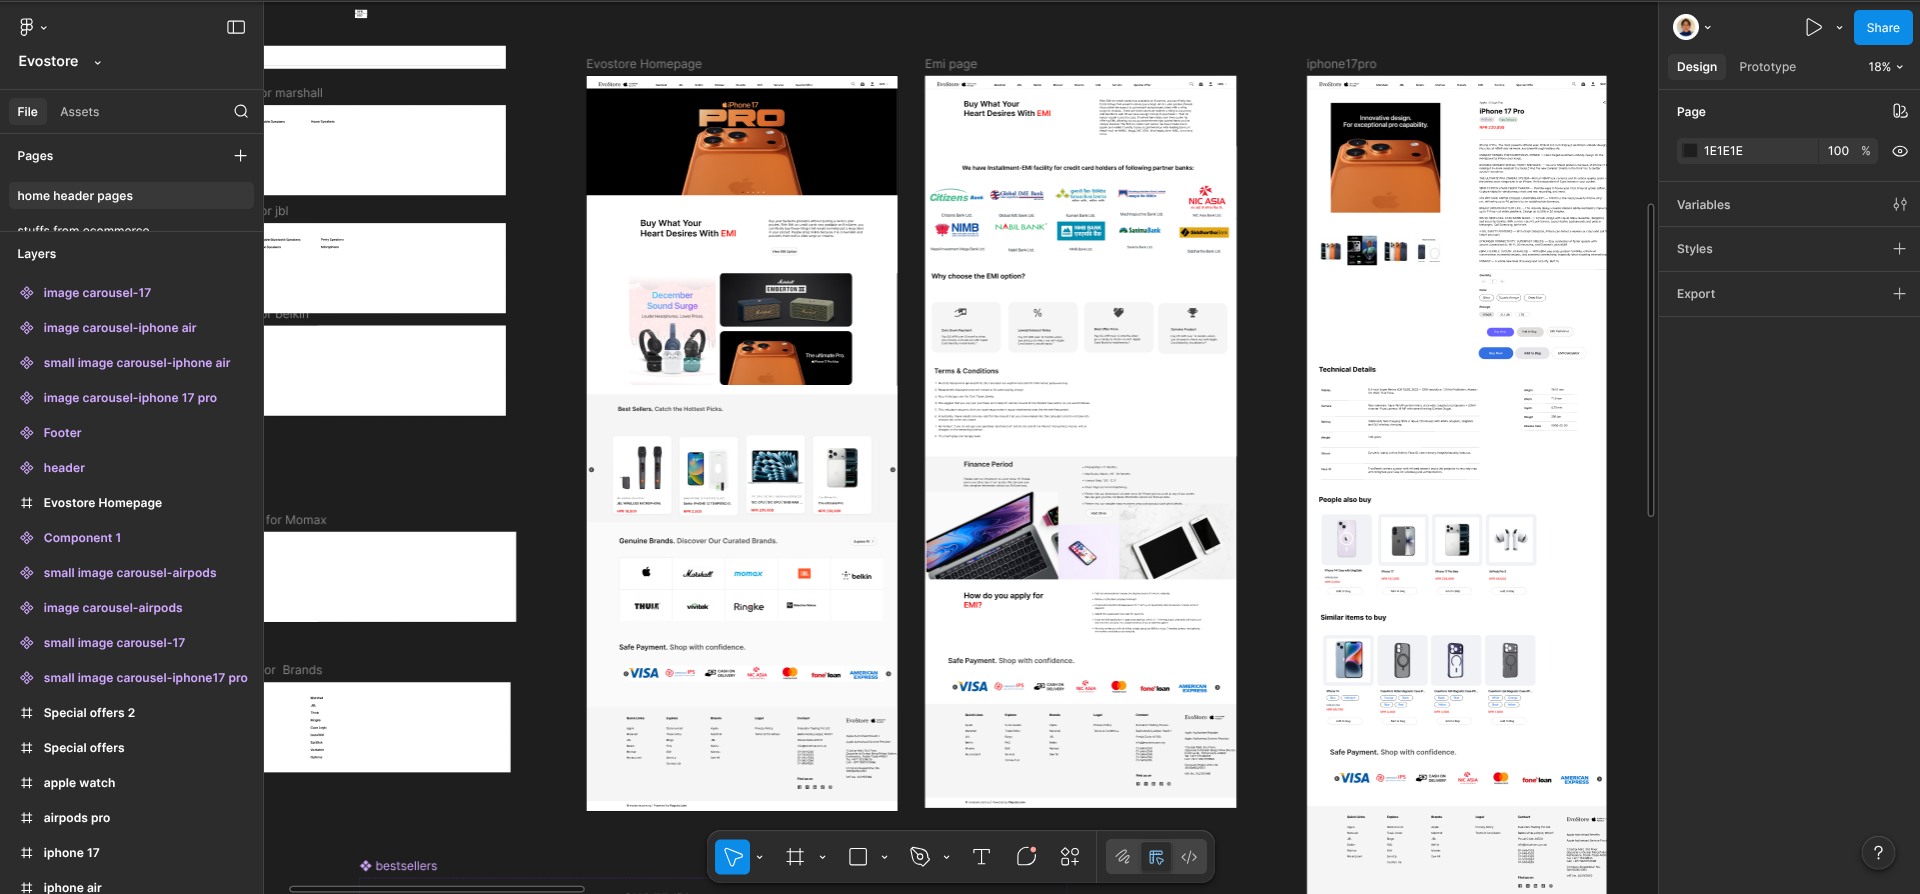
The first task I was assigned as an intern in SRIYOG on my very first day was to create a replica of https://evostore.com.np/ website. As heavy as it sounded for someone inexperienced , I have learned over time that jumping into small projects and solving real project problems rather than browsing countless youtube tutorials is always more fruitful.
Learn first and be creative about it later.
You can pick a website of your choice and try to replicate it. Figma youtube channel has countless videos to help you with its features. Here’s a link to some of them that I found to be useful.
Step 4: Build your wireframes
Now, by the time you create your website, you would have been familiar with basics of Figma like frames, shape, autolayout, plugins and even advanced features like components, variants and maybe even about interactive prototypes. This helps you to cater your creativity more effectively and efficiently now that you are familiar with figma features.
Before this step, you should have already sketched your screens on paper. After that, it’s time to move them to digital wireframes.
Do not hesitate to take references from google, various websites and pinterest. But also don't stand backfrom implementing your ideas and let those creative juices flow. Before you are a designer, you are also a user; use that to your advantage.Browse around various websites; find bugs or possible enhancements that could make the website better, implement that on yours and keep on enhancing it.
Create all your other objects as components like Buttons, Inputs, Dropdowns, Navbars, Cards, Labels, Footers, everything.
Now, whenever you want to add a text to a screen, you take an instance from the text component in the UI library. You can use plugins like Typescales to maintain text consistency as well. Not only this will save you hours of work, but it also maintains consistency throughout your product which is a crucial key point in UI/UX design.
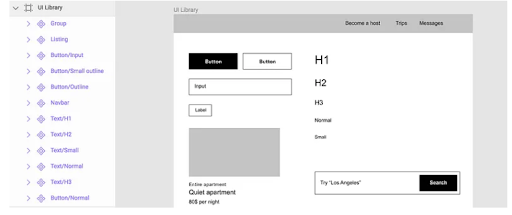
Here’s a simple example of UI library you can create for your first project.
You can also take reference from the public UI library provided by figma here:
But I suggest you create a simple UI library yourself since browsing through advance UI library can be overwhelming and demotivating at first.
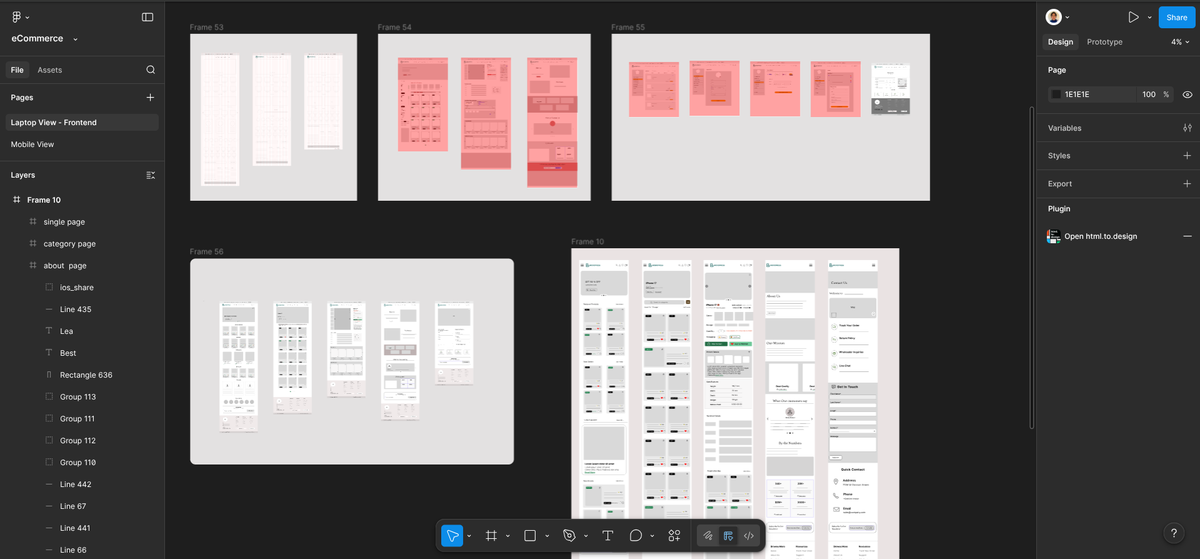
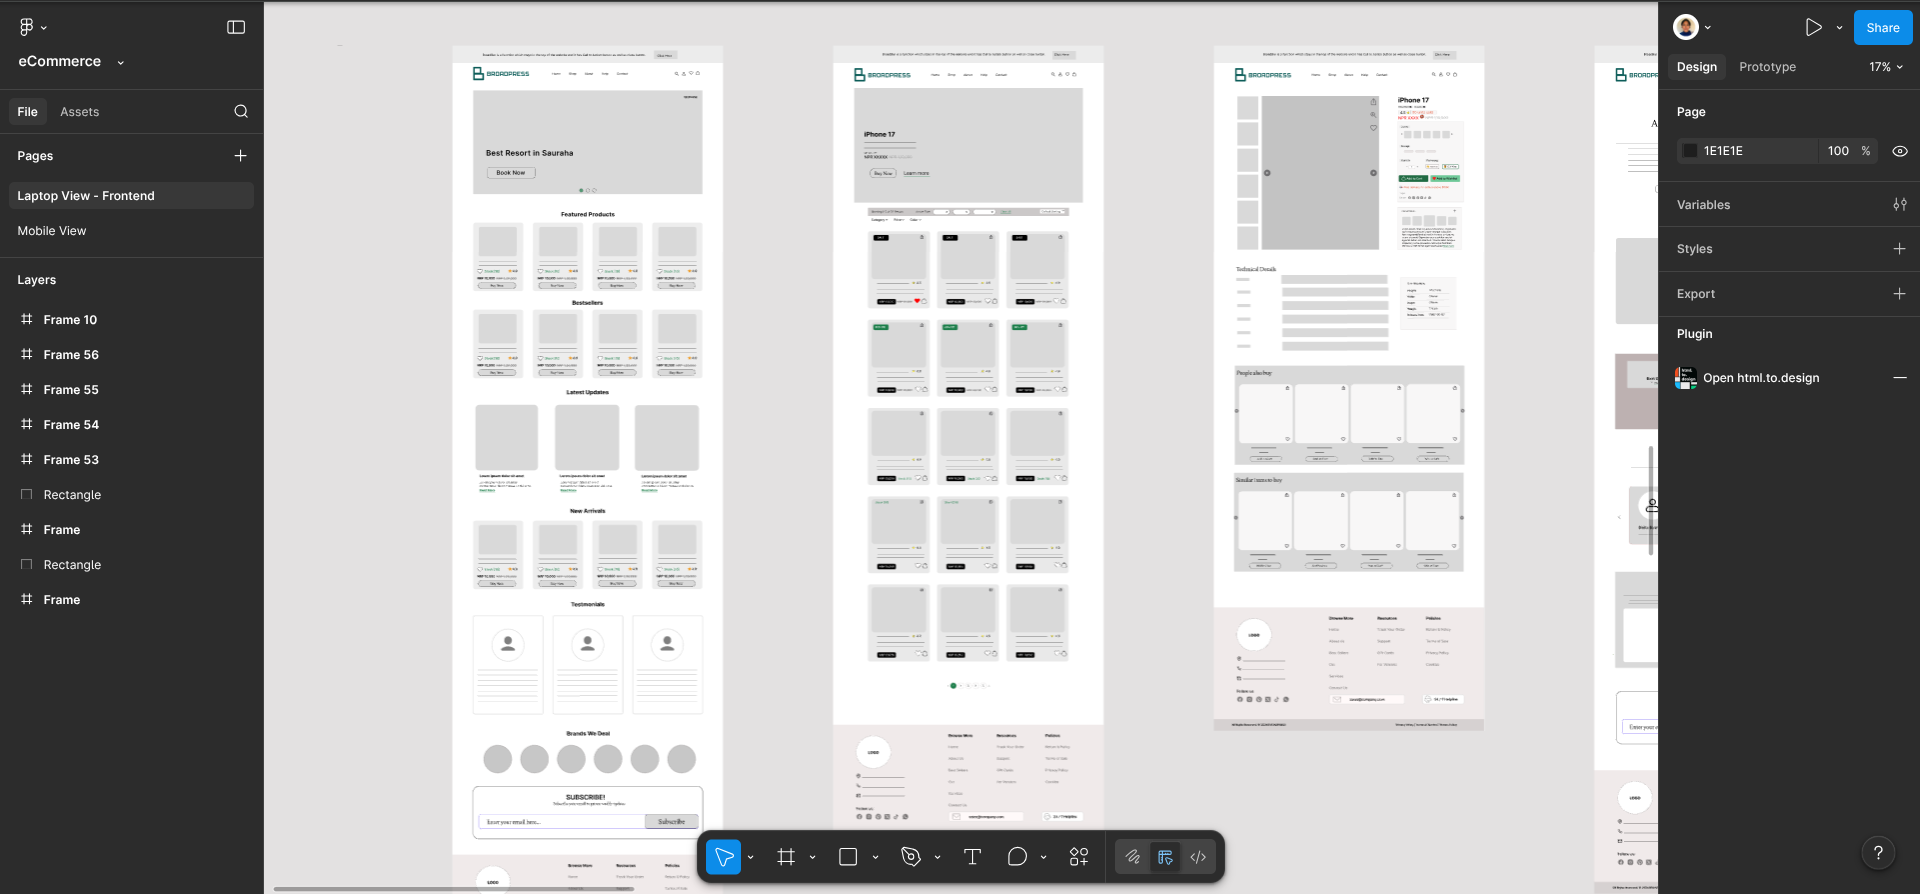
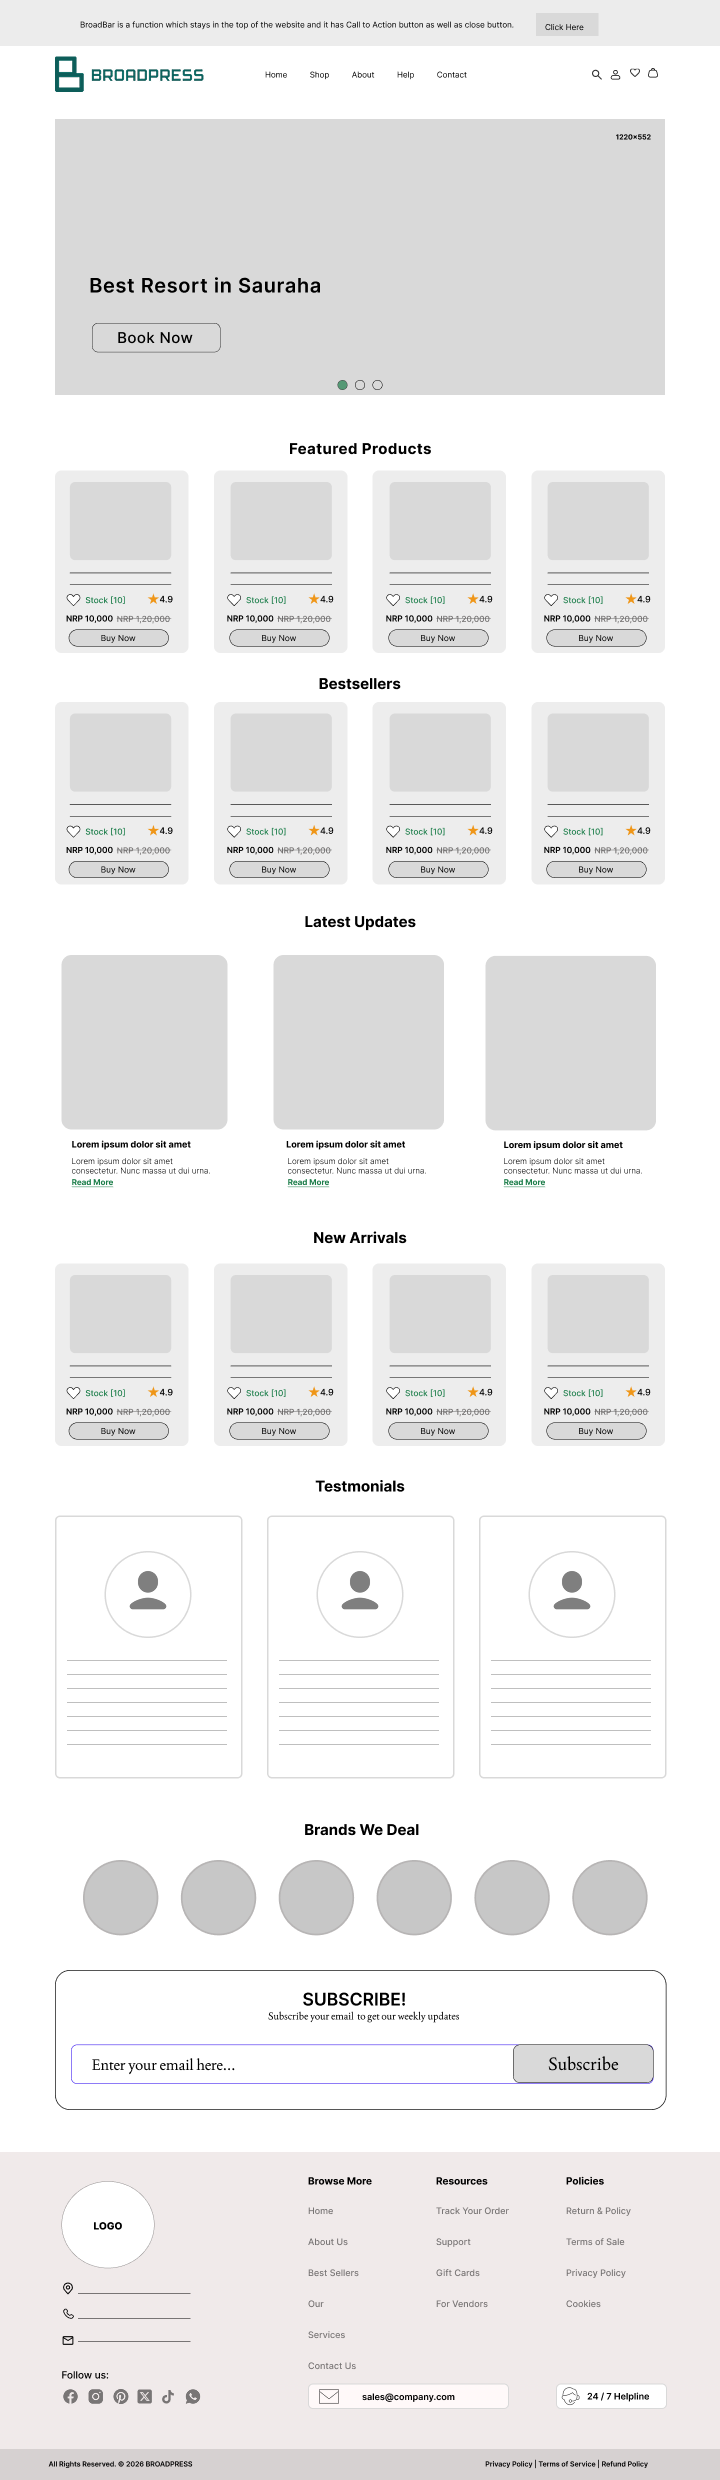
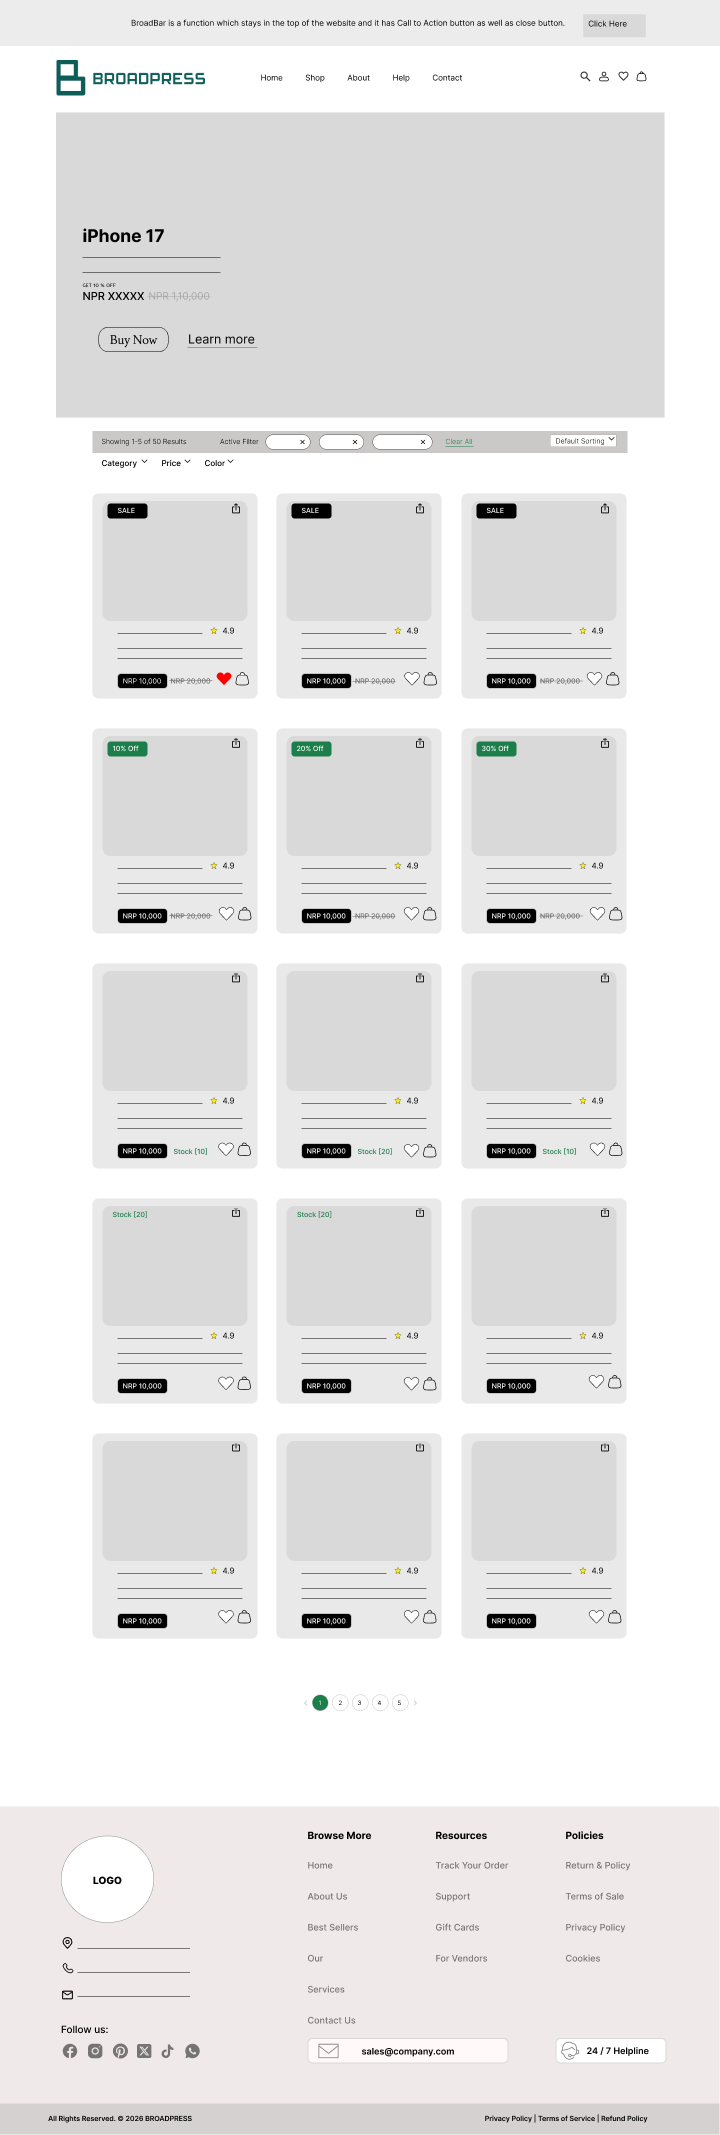
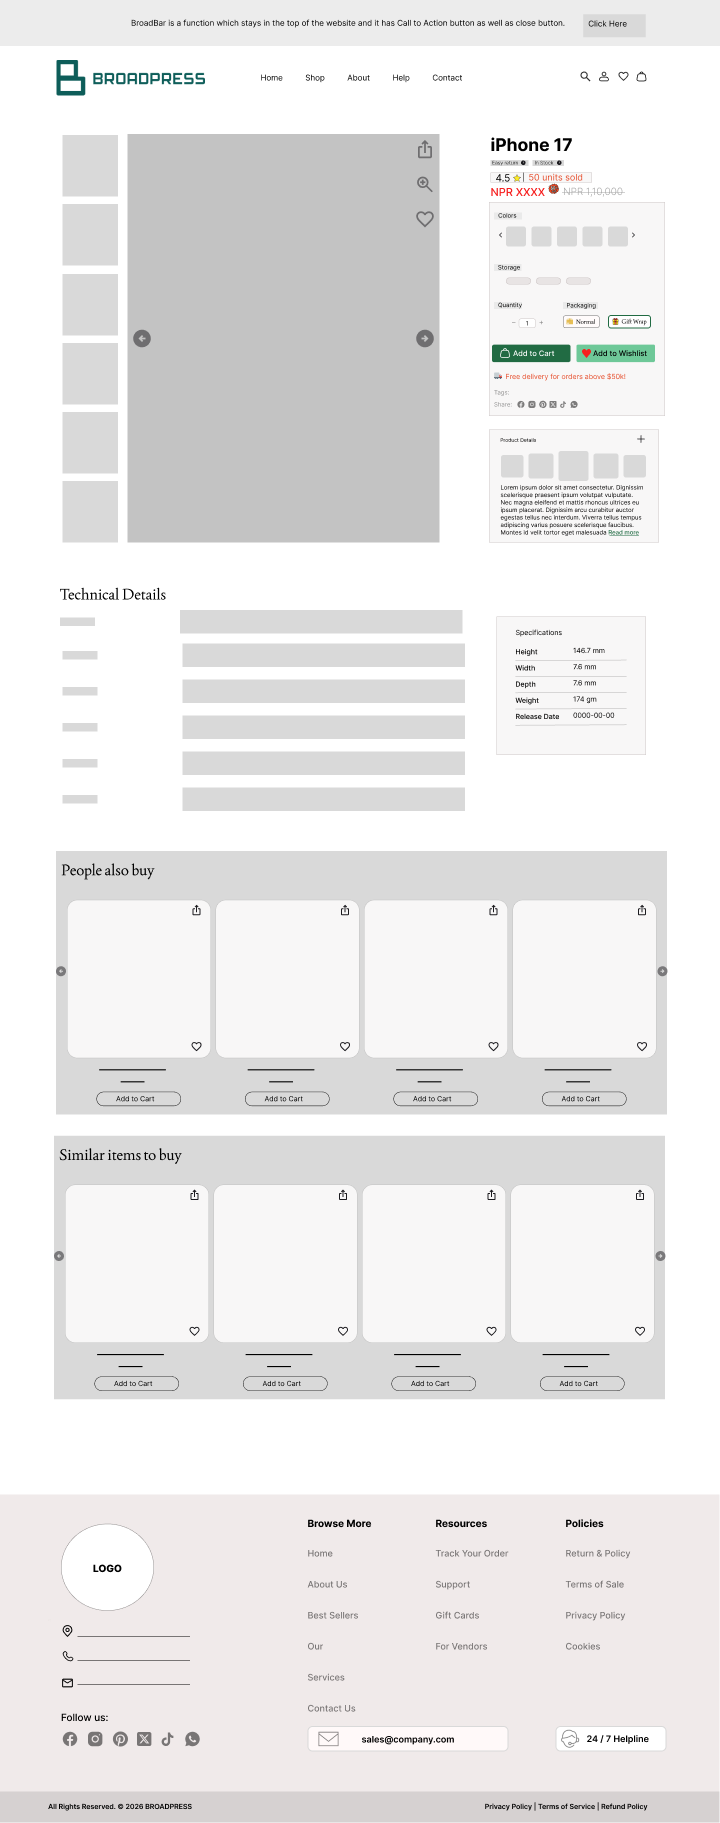
Below is an example of an e-commerce laptop view wireframe for homepage, single page and category page that I did but mind you it always didn’t look like this. It was refined and enhanced after feedbacks, suggestions, references and understanding that came with experience and learning.
Similarly, a mobile view of the homepage is also given to so that you get an idea on how to create a corresponding wireframe for mobile view from laptop view.

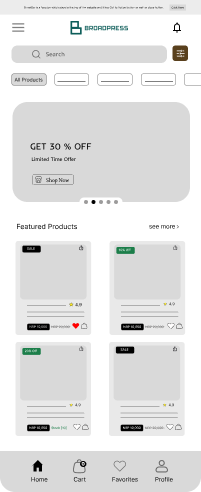
Here’s what a mobile app version might look like for the category page.
And that’s it! I hope my process in creating wireframes helps you navigate your next step of giving life to your project much easier. Any great website requires you to have clear and structured Wireframes that act as a skeletal framework. Once you have that under your belt, everything else becomes much easier.